NodeCG + React で作る動的なライブ配信画面
NodeCG を使用して、動的なライブ配信画面を作成する方法を紹介します。
NodeCG とは
NodeCG は Node.js とブラウザを使用して配信画面を作るフレームワークです。 OBS Studio (以下 OBS) などの配信ソフト単体では不可能もしくは難しい、動的なコンテンツを表示するのに使います。主な使用例として、 Games Done Quick や RTA in Japan など RTA イベントの画面があります。 NodeCG の CG は Character Generator の略です。
Bundle
NodeCG では Graphics と Dashboard と Extensions の 3 つをひとつにした Bundle を作ることで画面を作っていきます。
Graphics
Graphics は実際の配信画面に映る Web ページです。 OBS 内蔵のブラウザソース (Chromium) を使用して、 Graphics を配信画面に取り込みます。 Web ページで画面を作ってそれを配信に乗せるので、ブラウザでできることは何でも表現することができます。 CSS を書くなどして、透明 / 半透明にすることもできます。 Web Audio API などを使用して、音声を乗せることも可能です。
Graphics で使用するフロントエンドフレームワークなどは自由です。 React や Vue.js などを使用するのももちろん良し、 HTML を直接書いても良しです。
Dashboard
Dashboard は Graphics を裏方からコントロールするための Web ページです。 Graphics 上のタイマーやスコアボードの操作など、人間がコントロールするものについては Dashboard が担当します。
Dashboard から Message を飛ばしたり、 Replicant に値をセットして Graphics に変更を加えるよう通知します。変更通知を listen している Graphics は通知を受け取って自身の Graphics を変更します。
Extensions
Extensions も Graphics を裏方からコントロールしますが、これはサーバーサイドで実行されます。 Dashboard を閉じていても実行が行われます。外部サービスの API を使用してリアルタイムに Graphics をコントロールするなど、人間がコントロールしないものについては Extensions が担当します。 RTA イベントではタイムテーブルやツイートの自動更新・表示などに使用されています。
こちらも同様、 Extensions から Message を飛ばしたり、 Replicant に値をセットして Graphics に変更を加えるよう通知します。また、 express を使用して API を公開すれば、外部から変更を加えることもできます。
Bundle に Graphics と Dashboard は必須ですが、 Extensions は任意です。
データの送受信
Graphics ・ Dashboard ・ Extensions 間でイベントを通知したりデータを同期させるために、 Messages と Replicants という仕組みがあります。
Messages
Messages で一時的な値をやり取りすることができます。主にイベントの発火に使われます。値は文字列や数値に限らず、オブジェクトや配列など JavaScript で表現できるものを送受信できます。
値の送信は nodecg.sendMessage() を呼び、値の受信は nodecg.listenFor() でハンドラ関数を登録しておくことで行います。
Replicants
Replicants はデータを保存しておく機能です。 Graphics で Replicant の値を読み取って表示に適用します。 NodeCG では内部に Replicants データベースを持っており、セットしたデータはファイルに永続化されます。エラーで NodeCG が落ちた場合でもデータが保持されているので素早く再開できます。やり直しが効かないライブ配信においてかなり重要な機能です。
NodeCG のセットアップ
それではいくつか Bundle を作って NodeCG で使ってみましょう。まずは NodeCG 本体 を clone し、パッケージをインストールします。
$ git clone https://github.com/nodecg/nodecg.git
$ cd nodecg
$ npm i
まだ何もしていませんが、 NodeCG を実行してみましょう。
$ npm start
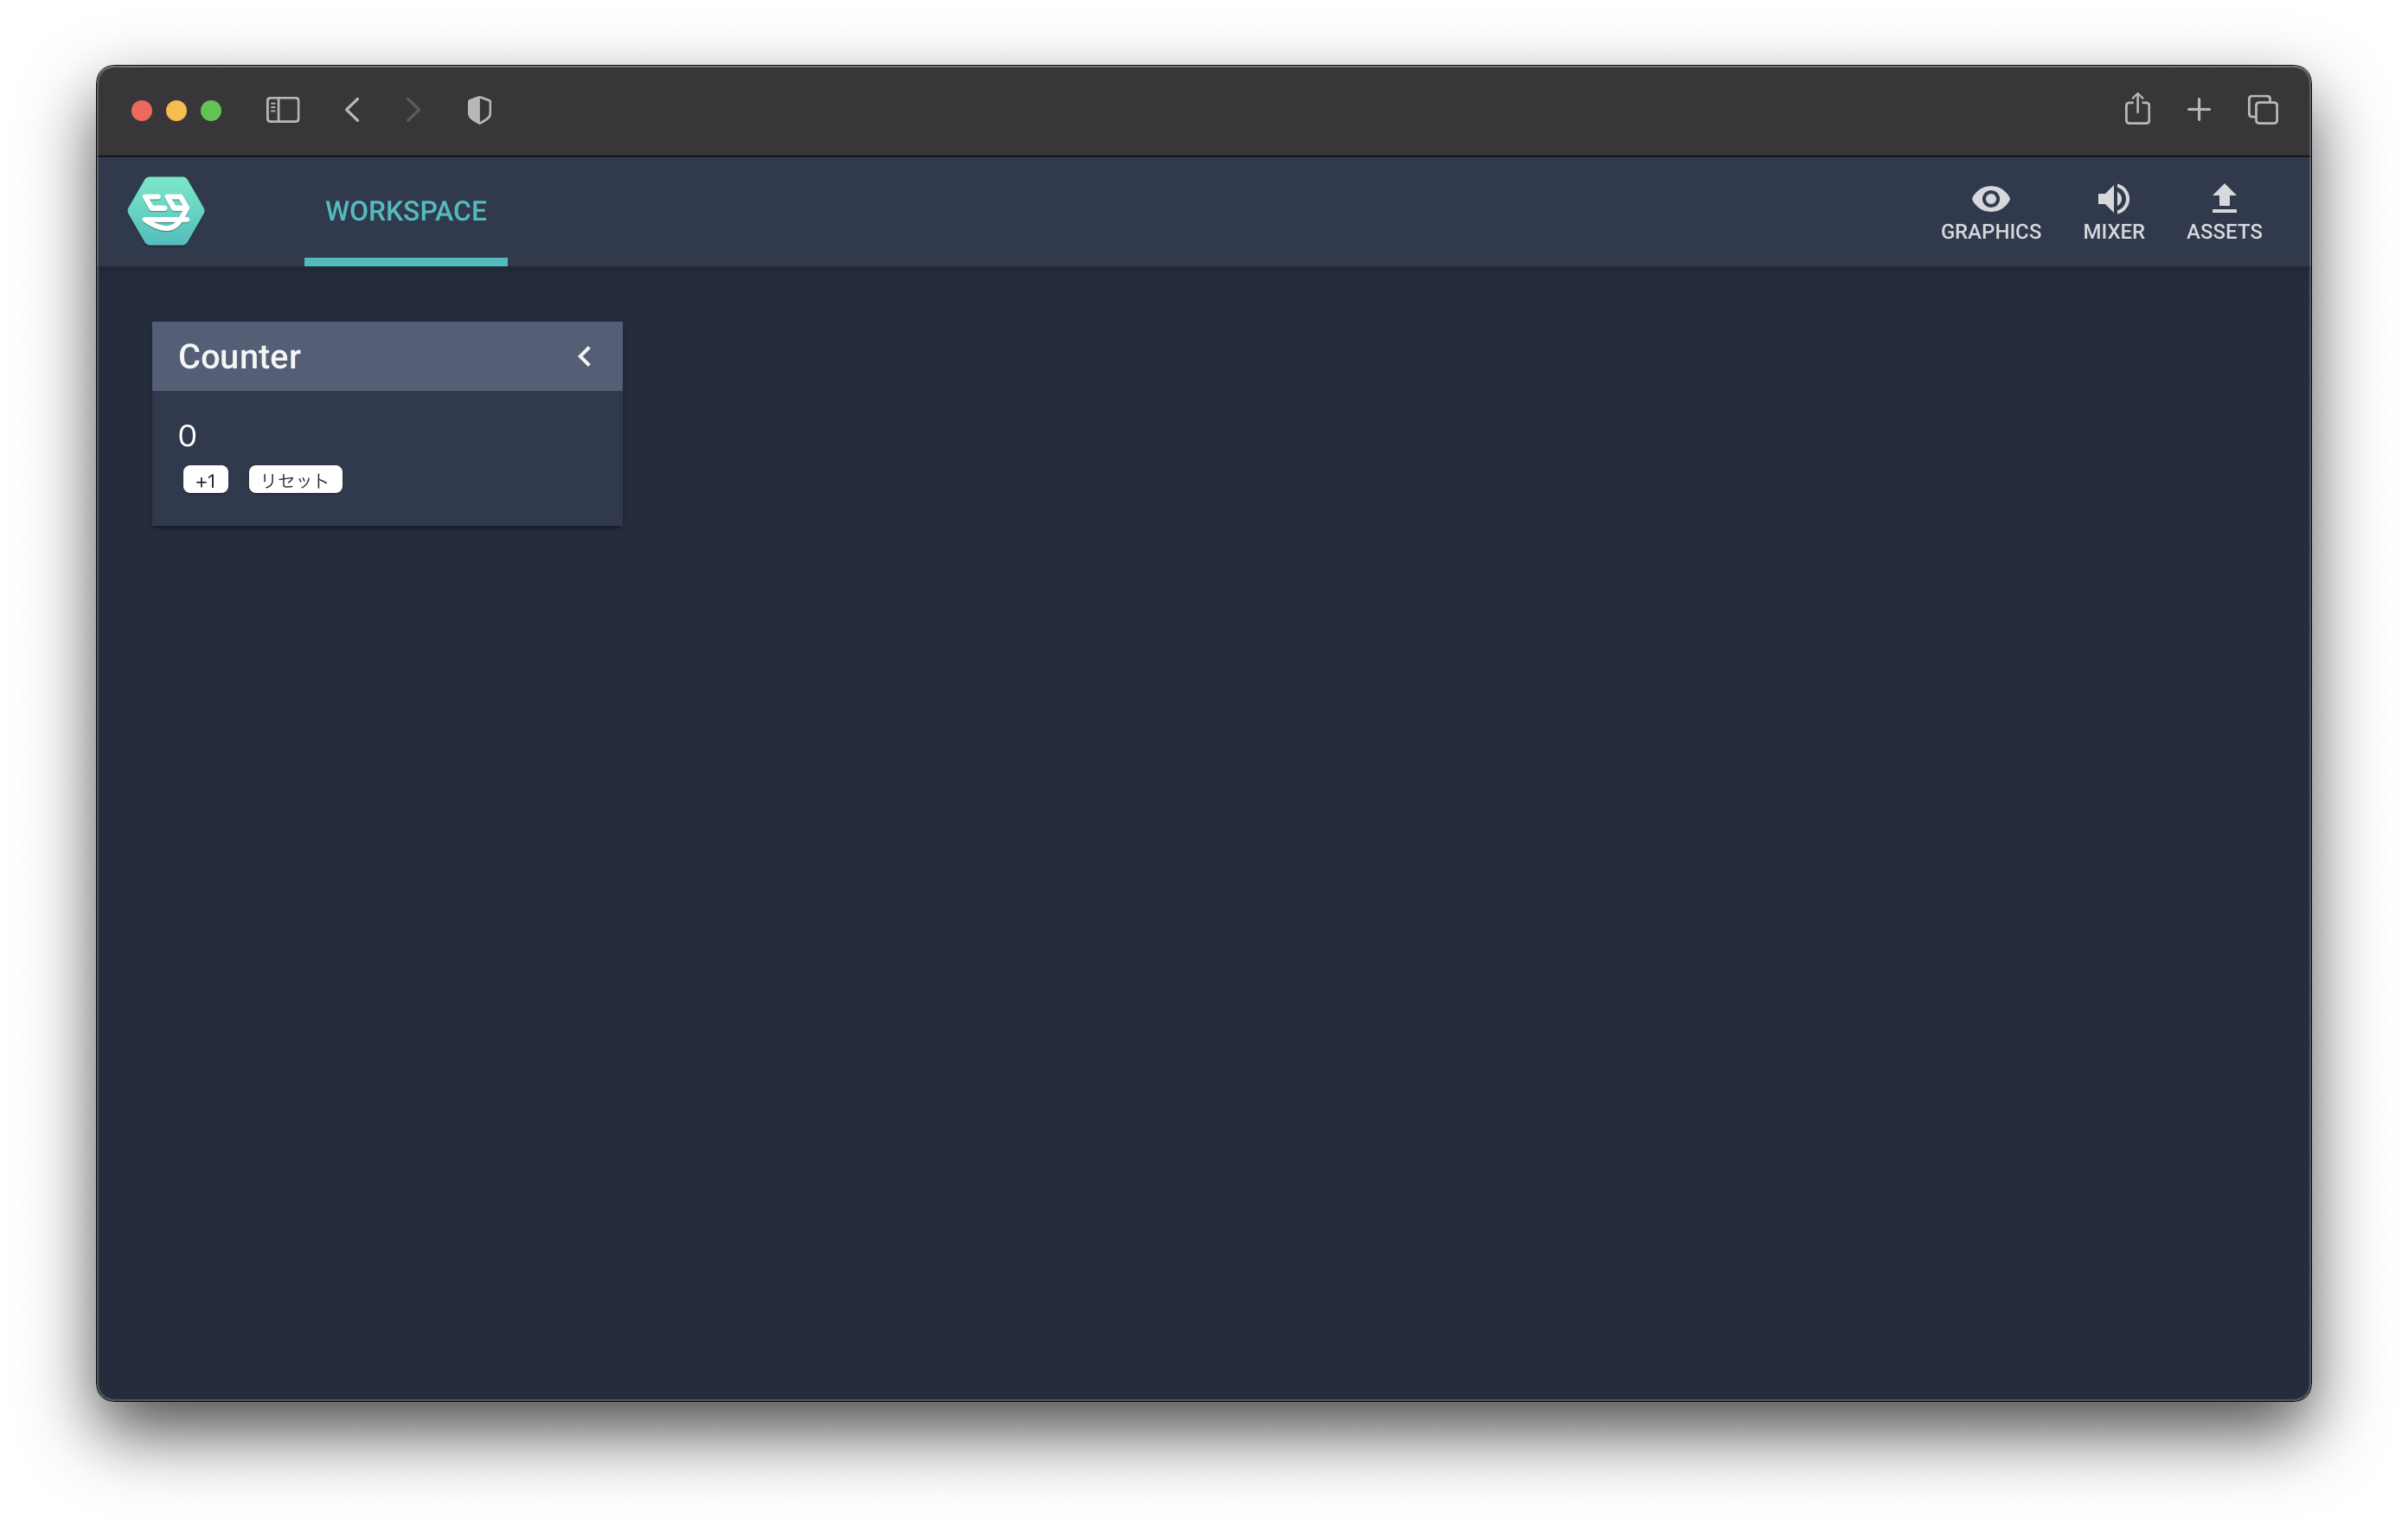
デフォルトでは localhost:9090 で NodeCG が動きます。 Web ブラウザで開いてみましょう。
![]()
NodeCG のワークスペースが表示されました。現時点では Bundle が無いので更地です。 Bundle に含まれる Dashboard のパネルがここに並びます。ワークスペースは複数作ることができ、機能ごとに操作画面を分けたりすることができます。
Bundle は nodecg の中の bundles ディレクトリに置くことになります。他のファイルやディレクトリはほとんど手を付けません。
カウンター Bundle
まずは React などを使用せず、単純な HTML ファイルを作ることで Bundle の作り方の雰囲気を掴みましょう。今回は Dashboard のボタンを押すとカウントが 1 ずつ増えるシンプルなものを作ってみます。
Bundle プロジェクトの初期化
まずは Bundle のディレクトリを作成します。今回は counter という名前で作ります。
$ cd bundles
$ mkdir counter
Bundle のバージョン管理は NodeCG ディレクトリではなく Bundle のディレクトリで行います。 counter ディレクトリに入って Git リポジトリを初期化します。
$ cd counter
$ git init
$ echo /node_modules/ > .gitignore
作業内容を適宜コミットしておきましょう。
作成した counter ディレクトリの中で npm プロジェクトをセットアップします。
$ cd counter
$ npm init -y
すると、いつもの package.json が生成されます。
Bundle Manifest の設定
package.json 中に nodecg の設定 (Manifest) を追加することで、 Bundle となります。
 {
   "name": "counter",
   // ...
+  "nodecg": {
+    "compatibleRange": "^1.1.1",
+    "dashboardPanels": [
+      {
+        "name": "counter",
+        "title": "Counter",
+        "width": 2,
+        "file": "dashboard.html",
+        "headerColor": "#525F78"
+      }
+    ],
+    "graphics": [
+      {
+        "file": "graphics.html",
+        "width": 1920,
+        "height": 1080
+      }
+    ]
+  }
 }
compatibleRange には、 Bundle が対応する NodeCG のバージョンを指定します。
dashboardPanels には Dashboard に含まれるパネルを列挙します。この中の width は 1 から 8 の値でパネルの幅を指定します。 width の値を とすると実際のサイズは となります。 file は dashboard ディレクトリ内の HTML ファイルのパスを書きます。つまり、 Dashboard のファイルは dashboard ディレクトリ内に配置することになります。
graphics には Graphics を列挙します。 file は graphics ディレクトリ内の HTML ファイルのパスを書きます。つまり、 Graphics のファイルは graphics ディレクトリ内に配置することになります。 width と height は Graphics の幅と高さです。現在のライブ配信で最も一般的な 1080p のサイズ 1920x1080 を指定しておけば問題ないでしょう。
その他、 Dashboard のパネルを全画面にするなど様々な設定があります。詳しくは NodeCG のドキュメント で確認して下さい。 Bundle の作成を自動化する Yeoman Generator もあります。
Dashboard パネルの作成
今回作る Dashboard パネルはこんな感じです。
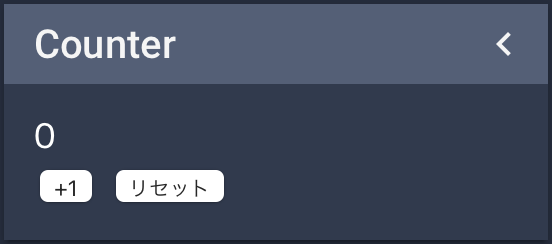
Dashboard のパネルは dashboard ディレクトリ内に作ります。
$ mkdir dashboard
$ touch dashboard/dashboard.html
<!DOCTYPE html>
<html lang="ja">
<head>
  <meta charset="UTF-8">
</head>
<body>
  <div id="counter"></div>
  <button id="increment">+1</button>
  <button id="reset">リセット</button>

  <script>
    const countReplicant = nodecg.Replicant('count', { defaultValue: 0 });

    countReplicant.on('change', value => {
      document.getElementById('counter').textContent = `${value}`;
    });

    document.getElementById('increment').addEventListener('click', () => {
      countReplicant.value += 1;
    });
    document.getElementById('reset').addEventListener('click', () => {
      countReplicant.value = 0;
    });
  </script>
</body>
</html>
div#counter は Graphics に設定されている値を確認するための要素です。手元でも値を確認できたほうが便利です。 button#increment と button#reset はそれぞれ値のインクリメントとリセット用のボタンです。ここまでは特に難しいことは無いと思います。
今回は簡単な例のため、直接 script 要素でロジックを書いています。 NodeCG の API にアクセスするために必要な nodecg は NodeCG サーバーによって自動的に注入されるので、自分でバンドルする必要はありません。
値をやり取りするためには Replicants を使用します。ここでは count という名前の Replicant を取得しています (存在しない場合は自動的に作成されます) 。値の変更イベントは on() 関数で change イベントにイベントハンドラを登録することで購読できます (Node.js のイベントと同じ仕様です) 。値が変わったら、 DOM を操作します。 Replicant に値を書き込むには、 value メンバに値を代入するだけです。
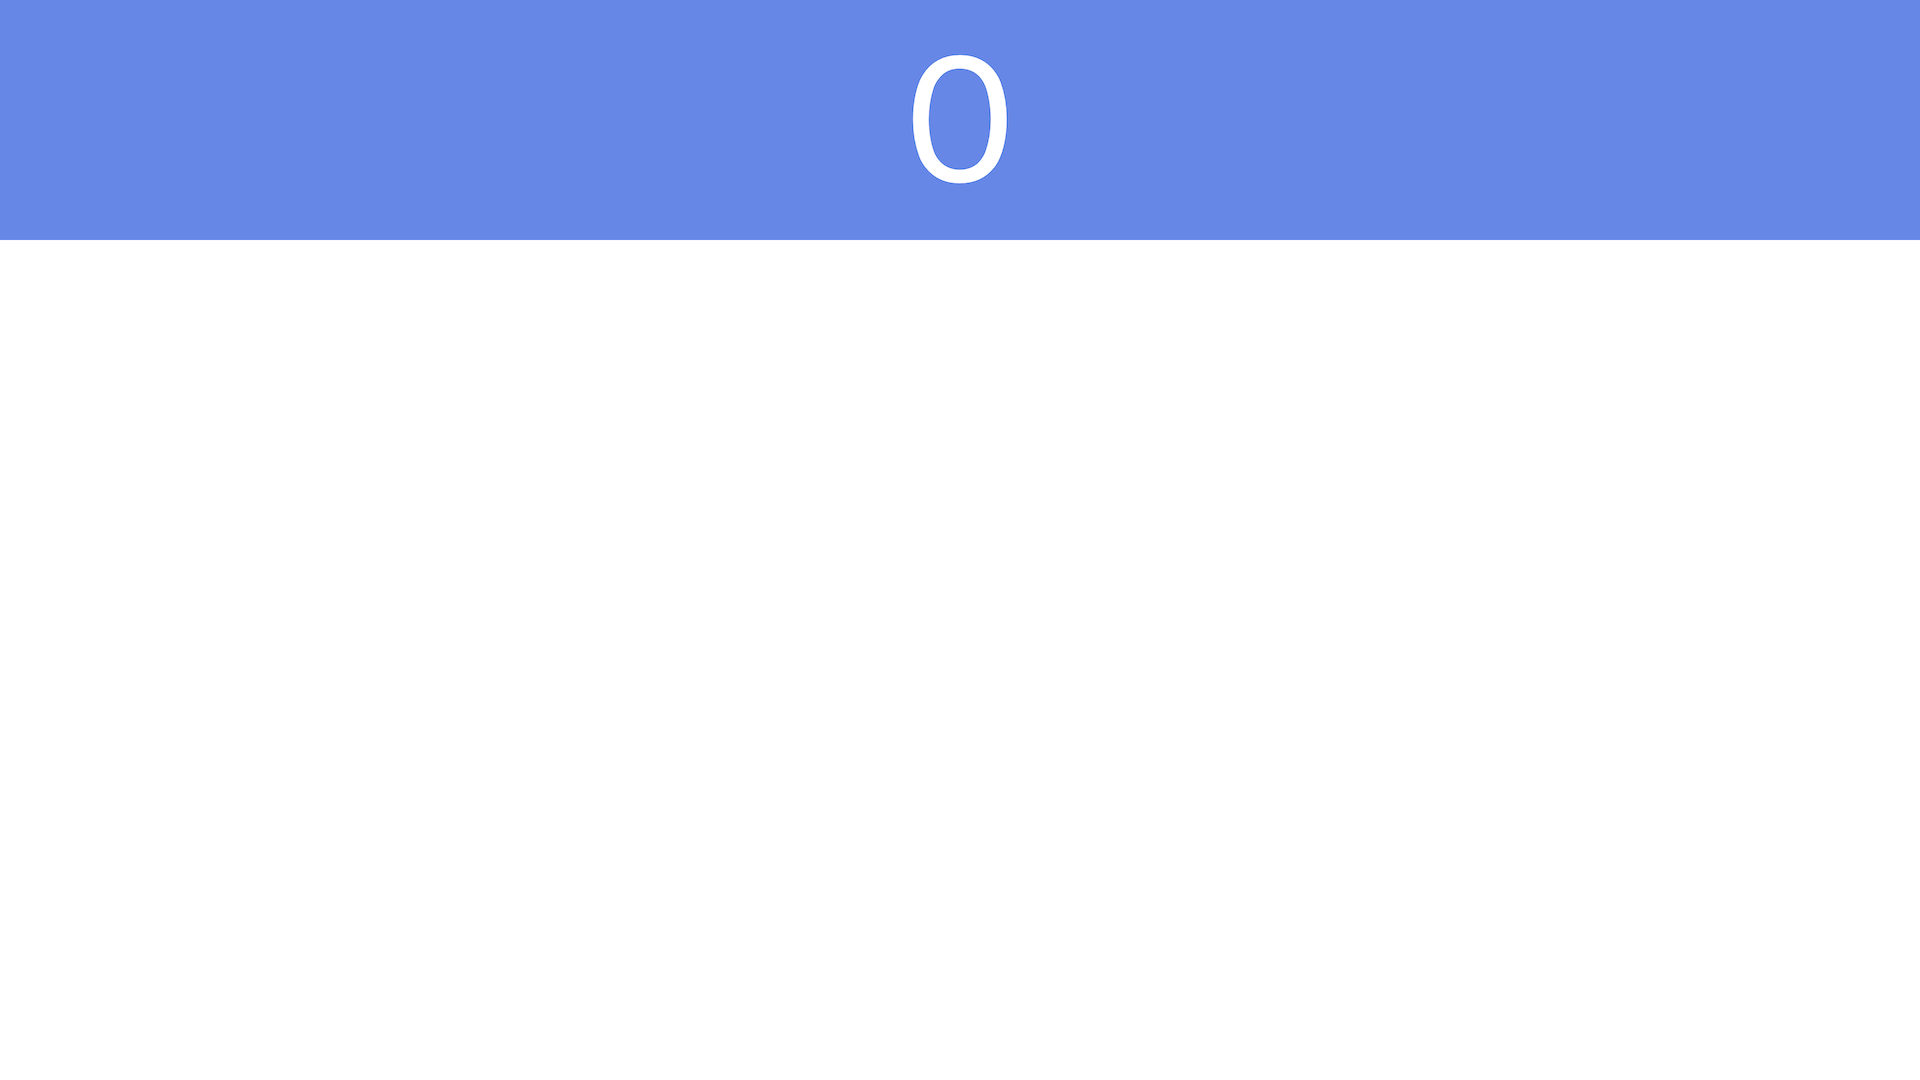
Graphics の作成
今回作る Graphics はこんな感じです。画面上部にカウントを表示します。
Graphics は graphics ディレクトリ内に作ります。
$ mkdir graphics
$ touch graphics/graphics.html
使用する API は Dashboard と同じです。
<!DOCTYPE html>
<html lang="ja">
<head>
  <meta charset="UTF-8">
  <title>Document</title>
  <style>
    * {
      margin: 0;
      padding: 0;
      box-sizing: border-box;
      overflow: hidden;
    }
    body {
      width: 1920px;
      height: 1080px;
    }
    #counter {
      width: 1920px;
      background: rgba(65, 105, 225, 0.8);
      color: white;
      font-family: sans-serif;
      font-size: 10rem;
      text-align: center;
    }
  </style>
</head>
<body>
  <div id="counter"></div>
  <script>
    nodecg.Replicant('count', { defaultValue: 0 }).on('change', value => {
      document.getElementById('counter').textContent = `${value}`;
    });
  </script>
</body>
</html>
こちらは Replicant の変更イベントを購読して DOM に反映しているだけです。 Graphics は視聴者が見るものですので、追加でいくつかスタイルを定義しています。 overflow: hidden; はスクロールバーを隠すために必要です。
OBS でレイアウト
これで Bundle は完成です。かなり簡単でした。 NodeCG を起動して、 OBS でレイアウトしてみましょう。
まずは NodeCG サーバーを起動します。 Bundle のディレクトリと NodeCG のディレクトリ間の移動を繰り返すのは面倒なのでサブシェル内で起動しています。
$ (cd ../.. && npm start)
NodeCG を起動して localhost:9090 を開くと、作成した Dashboard が表示されます。
右上の GRAPHICS をクリックすると、利用できる Graphics がすべて表示されます。
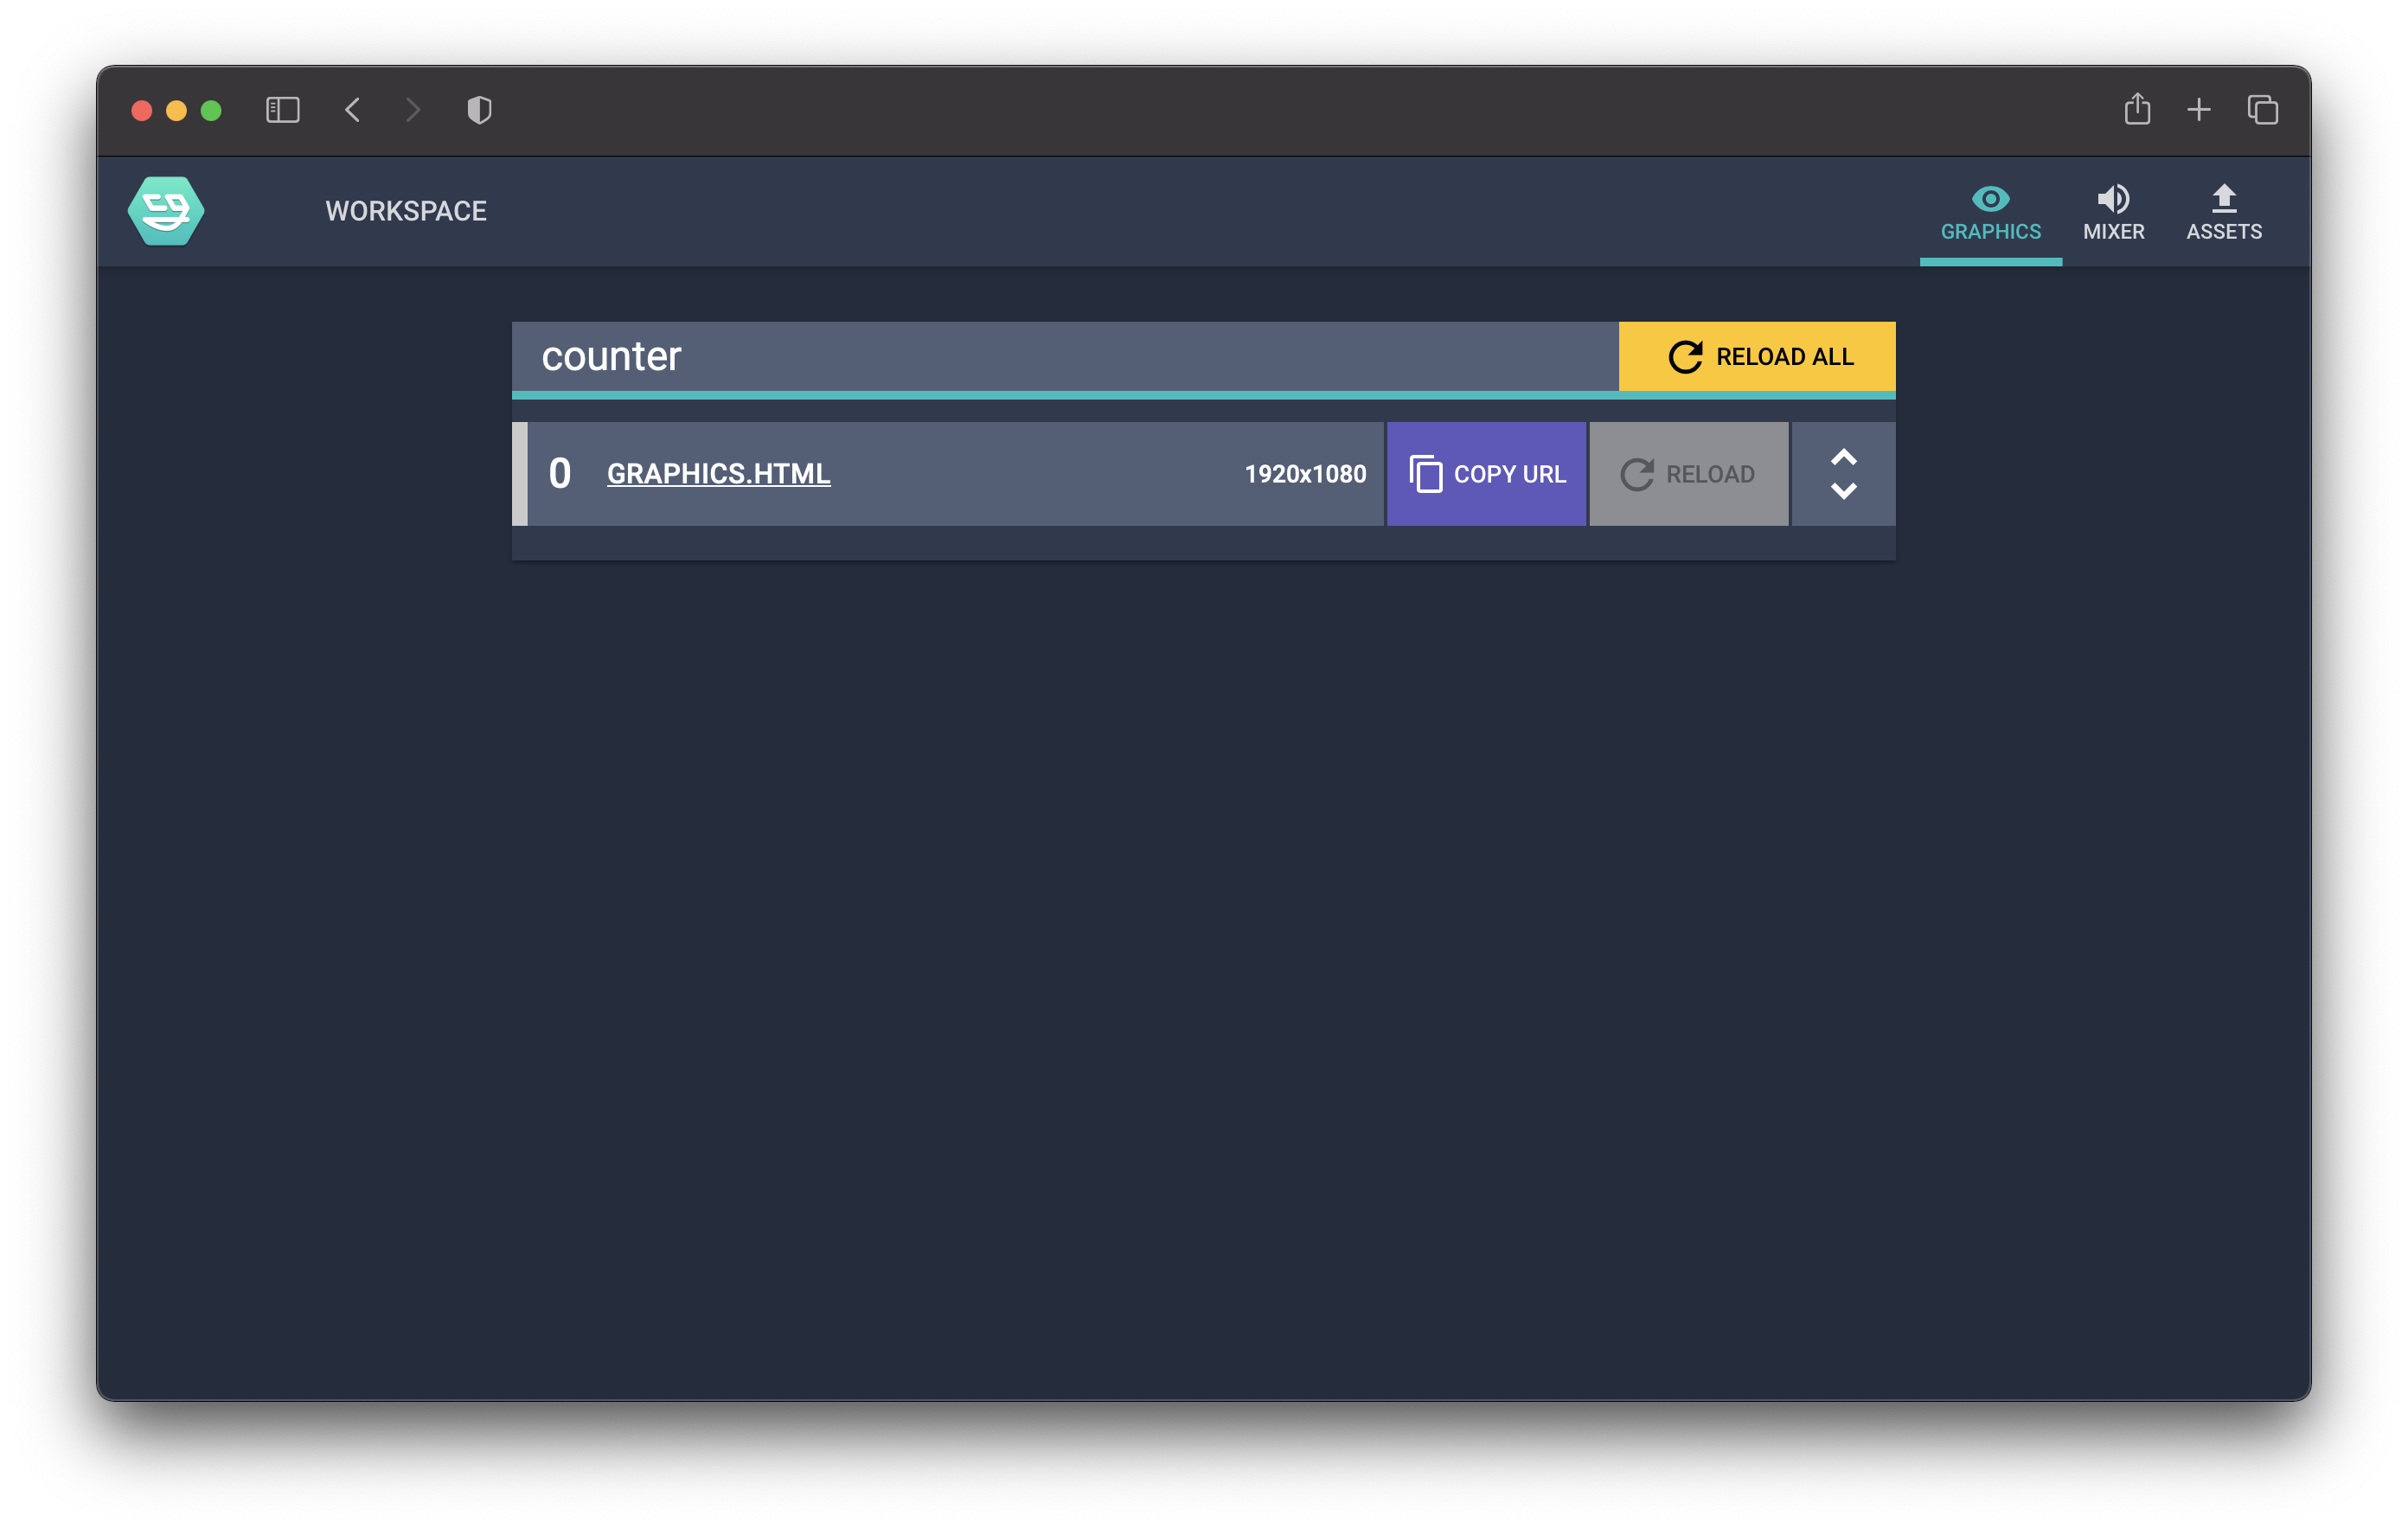
ここで COPY URL をクリックして、 Graphics のページの URL をコピーします。
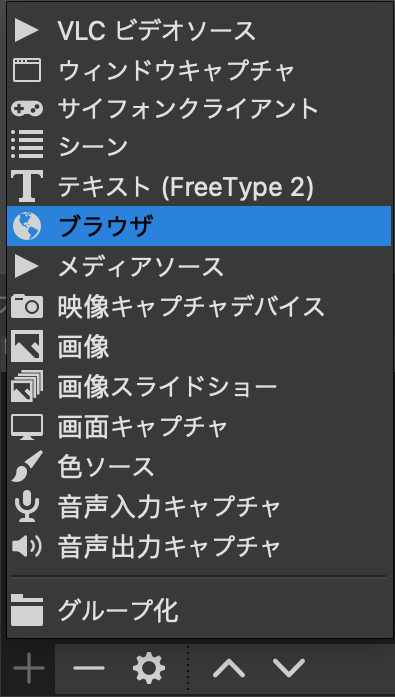
OBS でブラウザソースを追加します。
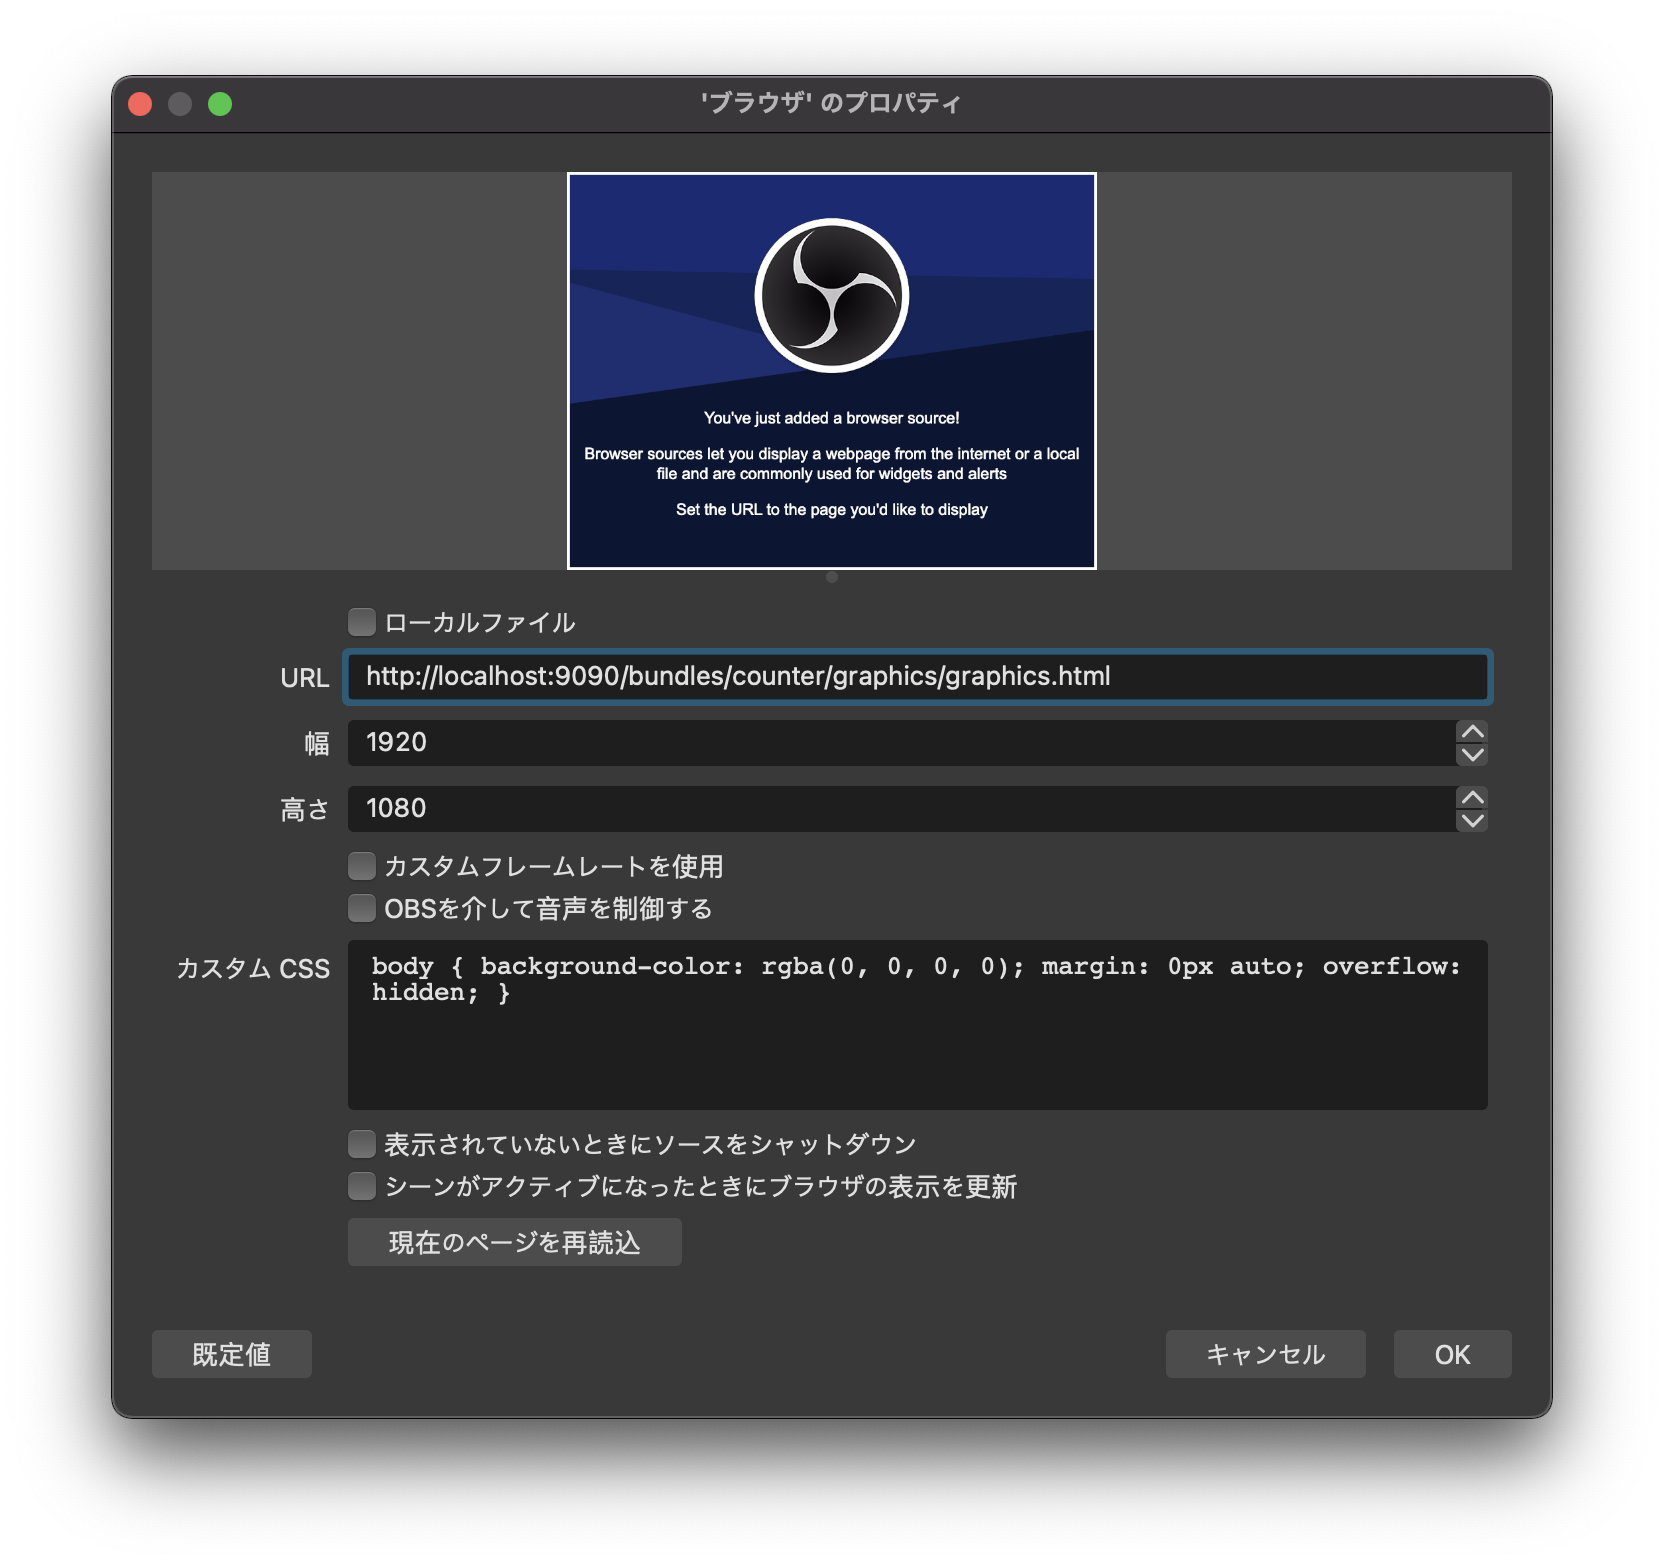
URL に先ほどコピーした URL を貼り付けます。幅と高さは Graphics のサイズに設定しましょう。デフォルトではカスタム CSS が設定されていますが、消しても大丈夫です。
レイアウトしたら、 Dashboard からカウントを操作してみましょう。

Graphics のカウントも自動的に更新されました。このように表示内容を裏方から操作することができます。 OBS を動かしている配信用 PC でなくても操作することができます。
途中で NodeCG サーバーを終了させても Replicants の値は保持されています。 Dashboard にのみエラーが表示され、 Graphics にエラーは表示されません。 NodeCG サーバーを再起動すると Dashboard と Graphics が自動的に再接続され、何事もなかったかのように再開できます。
今回は単純な例でしたが、次節は React を使用して本格的な Bundle を作ってみます。
テニス得点表示 Bundle
先程作成したカウンターは説明のためにかなり単純なものとなっていました。カウンターをもう一つ追加するなどして対戦ゲームの得点表示を作ることもできますが、これだと OBS 単体でもできますし NodeCG のうま味を体感することが難しいので、もう少し複雑なスコアボードを作ってみたいと思います。また、アニメーションを駆使して見た目も華やかなものを作ります。
今回は題材としてテニスの得点表示を作ってみたいと思います。テニスではポイントが 0 → 15 → 30 → 40 と動きますし、デュースなどの制度もあります。 OBS 上で手打ちすると間違ったりするので、なるべくコンピュータに任せましょう。
先程のカウンター Bundle では HTML ファイルを 1 枚ずつ書いてデモしましたが、今回は React と webpack を使用します。また、 TypeScript を使用し型を付けることで、堅牢かつ快適に開発を行います。
Bundle プロジェクトの初期化
nodecg/bundles ディレクトリに戻って、 tennis ディレクトリを作成します。
$ pwd
/path/to/nodecg/bundles
$ mkdir tennis
tennis ディレクトリに入って Git や npm パッケージの初期化を行います。
$ cd tennis
$ git init
$ npm init -y
今回、 dashboard と graphics ディレクトリの中身は webpack によって生成するので、バージョン管理から外しておきます。
/node_modules/
/dashboard/
/graphics/
今回はしっかり作るので、エディタをしっかり設定しておきます。 .editorconfig を作成します。使用しているエディタで EditorConfig が有効になるよう拡張機能などを設定して下さい。
root = true

[*]
end_of_line = lf
charset = utf-8
insert_final_newline = true
trim_trailing_whitespace = true
indent_style = space
indent_size = 2
Bundle Manifest の設定
nodecg の設定 (Manifest) を追加します。今回は Dashboard のパネルや Graphics の設定は後で追加します。
 {
   "name": "tennis",
   // ...
+  "nodecg": {
+    "compatibleRange": "^1.1.1"
+  }
 }
TypeScript の設定
型を付けて快適に開発しましょう。
$ npm i -D typescript
tsconfig.json に TypeScript の設定を書きます。
{
  "compilerOptions": {
    "target": "esnext",
    "module": "esnext",
    "lib": ["dom"],
    "jsx": "react",
    "sourceMap": true,
    "strict": true,
    "moduleResolution": "node",
    "esModuleInterop": true,
    "skipLibCheck": true,
    "forceConsistentCasingInFileNames": true
  }
}
ESLint ・ Prettier の設定
TypeScript コードのチェックや自動フォーマットを設定します。
$ npm i -D eslint{,-config-prettier,-plugin-{import,prettier,react{,-hooks}}} prettier @typescript-eslint/{eslint-plugin,parser}
注意: コマンドが長くなるのでブレース展開を使用しています。
.eslintrc.json と .eslintignore に ESLint の設定を書きます。
{
  "root": true,
  "extends": [
    "eslint:recommended",
    "plugin:import/errors",
    "plugin:import/warnings",
    "plugin:import/typescript",
    "plugin:react/recommended",
    "plugin:@typescript-eslint/eslint-recommended",
    "plugin:@typescript-eslint/recommended",
    "plugin:prettier/recommended",
    "prettier"
  ],
  "plugins": [
    "import",
    "react",
    "react-hooks",
    "@typescript-eslint",
    "prettier"
  ],
  "env": {
    "es6": true,
    "node": true,
    "browser": true
  },
  "parser": "@typescript-eslint/parser",
  "parserOptions": {
    "sourceType": "module",
    "project": "./tsconfig.json",
    "ecmaFeatures": {
      "jsx": true
    }
  },
  "rules": {
    "react/prop-types": "off",
    "react-hooks/rules-of-hooks": "error",
    "react-hooks/exhaustive-deps": "warn",
    "prettier/prettier": [
      "error",
      {
        "singleQuote": true,
        "trailingComma": "none",
        "arrowParens": "avoid"
      }
    ]
  },
  "settings": {
    "react": {
      "version": "detect"
    }
  }
}
/package.json
/package-lock.json
/dashboard/
/graphics/
package.json に ESLint を実行するスクリプトを定義します。
 {
   "name": "tennis",
   // ...
   "scripts": {
     "test": "echo \"Error: no test specified\" && exit 1",
+    "lint": "eslint 'src/**/*.{ts,tsx}' && tsc --noEmit",
+    "lint:fix": "eslint --fix 'src/**/*.{ts,tsx}' && tsc --noEmit"
   }
 }
webpack の設定
webpack を使用して TypeScript ファイルなどをビルドすることで、 HTML ファイルと単一の JavaScript ファイルを生成します。
$ npm i -D webpack{,-cli} ts-loader html-webpack-plugin cross-env ts-node
webpack.config.ts に webpack の設定を書きます。
import { resolve } from 'path';
import HtmlWebpackPlugin from 'html-webpack-plugin';
import type { Configuration } from 'webpack';

const NODE_ENV =
  process.env.NODE_ENV === 'production' ? 'production' : 'development';

const createBrowserConfig = (
  type: 'dashboard' | 'graphics',
  name: string
): Configuration => ({
  mode: NODE_ENV,
  entry: resolve(__dirname, 'src', type, name, 'index.tsx'),
  output: {
    path: resolve(__dirname, type),
    filename: `${name}.js`
  },
  module: {
    rules: [
      {
        test: /\.tsx?$/,
        use: 'ts-loader'
      }
    ]
  },
  resolve: {
    extensions: ['.js', '.jsx', '.ts', '.tsx']
  },
  plugins: [
    new HtmlWebpackPlugin({
      template: resolve(__dirname, 'src', type, name, 'index.html'),
      filename: `${name}.html`
    })
  ],
  externals: ['nodecg'],
  devtool: NODE_ENV === 'development' ? 'inline-source-map' : void 0
});

const config: Configuration[] = [];
export default config;
createBrowserConfig() は webpack の設定 (Configuration 型) を作る関数です。引数 type に 'dashboard' か 'graphics' を、 name にパネル名や Graphics 名を指定します。これを配列 config に指定することで設定が適用されます。 config は一旦空の配列にしておきます。
webpack.config.ts は TypeScript の設定が異なるので、 tsconfig.webpack.json に個別の設定を書きます。
{
  "compilerOptions": {
    "target": "es5",
    "module": "commonjs",
    "moduleResolution": "node",
    "esModuleInterop": true,
    "skipLibCheck": true
  },
  "include": ["webpack.config.ts"]
}
最後にビルドスクリプトを package.json に設定します。ソースコードの変更を検出して自動的にビルドし直す watch スクリプトも追加します。 ESLint のスクリプトも修正します。
 {
   "name": "tennis",
   // ...
   "scripts": {
     "test": "echo \"Error: no test specified\" && exit 1",
-    "lint": "eslint 'src/**/*.{ts,tsx}' && tsc --noEmit",
+    "lint": "eslint 'src/**/*.{ts,tsx}' webpack.config.ts && tsc --noEmit --project tsconfig.webpack.json && tsc --noEmit",
-    "lint:fix": "eslint --fix 'src/**/*.{ts,tsx}' && tsc --noEmit",
+    "lint:fix": "eslint --fix 'src/**/*.{ts,tsx}' webpack.config.ts && tsc --noEmit --project tsconfig.webpack.json && tsc --noEmit",
+    "build": "cross-env NODE_ENV='production' TS_NODE_PROJECT='tsconfig.webpack.json' webpack",
+    "watch": "cross-env NODE_ENV='production' TS_NODE_PROJECT='tsconfig.webpack.json' webpack --watch"
   }
 }
React の設定
React をインストールします。
$ npm i react react-dom
$ npm i -D @types/{react,react-dom}
型の定義
まずは Replicants の型とデフォルト値を定義します。 src ディレクトリを作成し、 src/replicant.ts に定義します。
$ mkdir src
export interface Score {
  point: 0 | 1 | 2 | 3 | 4;
  game: number;
}

export interface ReplicantMap {
  names: [string, string];
  scores: [Score, Score];
}

export const replicantDefaultValues: ReplicantMap = {
  names: ['プレイヤーA', 'プレイヤーB'],
  scores: [
    { point: 0, game: 0 },
    { point: 0, game: 0 }
  ]
};
ReplicantMap 型は、すべての Replicant をオブジェクトにまとめた型です。
names でプレイヤー名を表します。 scores 中の point で 1 は 15 ポイント、 2 は 30 ポイント、 3 は 40 ポイント、 4 はデュース時のアドバンテージを表すことにします。
Replicants の定義が終わったら、 NodeCG のインスタンスの型を定義します。 ts-nodecg パッケージを使用すると簡単に定義できます。
$ npm i -D ts-nodecg
src/global.d.ts に nodecg の型を定義します。 ReplicantMap 型を import して定義します。
import type { CreateNodecgInstance } from 'ts-nodecg/browser';
import type { ReplicantMap } from './replicant';

declare global {
  const nodecg: CreateNodecgInstance<
    'tennis',
    undefined,
    ReplicantMap,
    { [x: string]: never }
  >;
}
CreateNodecgInstance 型の型変数にバンドル名や Replicants の型情報を渡すことで、 nodecg の型を定義することができます。 これで、 nodecg を通して型安全に Replicants を使えるようになりました。他の型パラメータで Messages の型を定義することもできます。
Replicant フックの作成
React 中で Replicant を簡単に扱えるよう、カスタムフックを作ります。 src/hooks.ts に useReplicant() を書きます。
import { useCallback, useEffect, useState } from 'react';
import { replicantDefaultValues, type ReplicantMap } from './replicant';

export const useReplicant = <T extends keyof ReplicantMap>(
  name: T
): [ReplicantMap[T] | undefined, (newValue: ReplicantMap[T]) => void] => {
  const [rep] = useState(() =>
    nodecg.Replicant(name, {
      defaultValue: replicantDefaultValues[name]
    })
  );
  const [value, setValue] = useState(rep.value);
  useEffect(() => {
    const handleChange = (newValue: ReplicantMap[T]) => setValue(newValue);
    rep.on('change', handleChange);
    return () => {
      rep.removeListener('change', handleChange);
    };
  }, [rep]);
  return [value, useCallback(newValue => (rep.value = newValue), [rep])];
};
この useReplicant() は Replicant の名前を受け取り、 Replicant の値と更新関数を返すフックです。 useState() フックのように Replicants を扱うことができます。
まずは NodeCG の API を使用して、 Replicant を取得します。 useState() を使って Replicant の値をローカル状態として持っておきます。 useEffect() を使って Replicant の変更通知を購読し、値の変更があったらローカル状態 value を更新します。これで簡単に React から Replicant を使用・更新することができるようになりました。型はなるべく狭くなるようにしているので、安心して Replicant を使うことができます。
ポイント加算操作パネルの作成
ポイント加算操作のみを行う Dashboard パネルを作ります。ライブ配信中は、点数の修正等がない限りポイント加算操作のみを行うので、誤操作防止のため必要最低限の機能を持ったパネルを作ります。
まずは package.json の NodeCG Manifest にパネルの定義を追加します。名前は point とします。
 {
   "name": "tennis",
   // ...
   "nodecg": {
     "compatibleRange": "^1.1.1",
+    "dashboardPanels": [
+      {
+        "name": "point",
+        "title": "Point",
+        "width": 3,
+        "file": "point.html",
+        "headerColor": "#525F78"
+      }
+    ]
   }
 }
続いて webpack.config.ts に設定を追加します。事前に定義した createBrowserConfig() 関数を使用します。
-const config: Configuration[] = [];
+const config: Configuration[] = [createBrowserConfig('dashboard', 'point')];
スタイルは styled-components を使用したいと思います。もちろん他のフレームワークを使用しても OK です。
$ npm i styled-components
$ npm i -D @types/styled-components
src/dashboard/point ディレクトリを作成し、その中に index.html と index.tsx を作成します。
$ mkdir -p src/dashboard/point
<!DOCTYPE html>
<html lang="ja">
<head>
  <meta charset="UTF-8">
  <meta name="viewport" content="width=device-width, initial-scale=1.0">
  <title>Point</title>
</head>
<body>
  <div id="app"></div>
</body>
</html>
import React from 'react';
import ReactDOM from 'react-dom';
import { GlobalStyle } from '../../style';
import { App } from './App';

ReactDOM.render(
  <React.StrictMode>
    <GlobalStyle />
    <App />
  </React.StrictMode>,
  document.getElementById('app')
);
<GlobalStyle> コンポーネントと <App> コンポーネントが未定義なので定義します。
まずは src/style.ts を作成します。ここにグローバルスタイル (主にスタイルリセット) を styled-components を使用して書きます。
import { createGlobalStyle } from 'styled-components';

export const GlobalStyle = createGlobalStyle`
  * {
    margin: 0;
    padding: 0;
    box-sizing: border-box;
  }

  button {
    background-color: transparent;
    border: none;
    cursor: pointer;
    outline: none;
    padding: 0;
    appearance: none;
    color: inherit;
    font-size: inherit;
    text-transform: inherit;

    &:focus-visible {
      outline: revert;
    }
  }

  input {
    padding: 0.5rem;
    font-size: 1rem;
    border: 1px solid gray;
    border-radius: 4px;
    color: unset;
    background: unset;
    appearance: none;
    outline: none;

    &:focus {
      border-color: royalblue;
    }
  }
`;
全称セレクタを使用して margin と padding を 0 に設定し、 box-sizing を border-box に設定します。最低限これをやっておけばレイアウトで嵌ることはないでしょう。その他 UI の要素に対してもリセットを書きます。
次に src/dashboard/ui.ts に Dashboards で共通の UI を書きます。今回はボタンを定義しておきます。
import styled from 'styled-components';

export const Button = styled.button<{ color?: 'primary' | 'danger' }>`
  background: ${({ color = 'primary' }) =>
    color === 'primary' ? 'royalblue' : 'crimson'};
  color: white;
  border-radius: 4px;

  &:active {
    box-shadow: 0 0 0 2px white;
  }
`;
styled-components を使用して、スタイル付きの <button> 要素を定義しました。 color プロパティで色の種類を変更できるようにしています。
次に src/dashboard/point/App.tsx を作成します。ここにパネルの UI とロジックを書きます。
import React, { useCallback, type VFC } from 'react';
import styled from 'styled-components';
import { Button } from '../ui';
import { useReplicant } from '../../hooks';
import { pointToString } from '../../utils';

const ScoreWrapper = styled.div`
  display: flex;
  flex-direction: column;
  gap: 0.5rem;
`;

const Text = styled.p<{ textSize?: number }>`
  display: flex;
  align-items: center;
  justify-content: center;
  height: ${({ textSize = 1 }) => `${textSize}rem`};
  font-size: ${({ textSize = 1 }) => `${textSize}rem`};
`;

const AddButton = styled(Button)`
  display: flex;
  align-items: center;
  justify-content: center;
  height: 4rem;
  font-size: 4rem;
`;

const Score: VFC<{ i: 0 | 1 }> = ({ i }) => {
  const [names] = useReplicant('names');
  const [scores, setScores] = useReplicant('scores');

  const increment = useCallback(() => {
    if (typeof scores === 'undefined') return;
    const j = 1 - i;
    const newScores = [{ ...scores[0] }, { ...scores[1] }] as typeof scores;

    if (
      scores[i].point === 4 ||
      (scores[i].point === 3 && scores[j].point <= 2)
    ) {
      newScores[i].game += 1;
      newScores[i].point = 0;
      newScores[j].point = 0;
    } else if (scores[i].point === 3 && scores[j].point === 4) {
      newScores[j].point -= 1;
    } else {
      newScores[i].point += 1;
    }

    setScores(newScores);
  }, [i, scores, setScores]);

  if (typeof names === 'undefined' || typeof scores === 'undefined')
    return null;

  return (
    <ScoreWrapper>
      <Text>{names[i]}</Text>
      <Text textSize={2}>{scores[i].game}</Text>
      <Text textSize={3}>{pointToString(scores[i].point)}</Text>
      <AddButton onClick={increment}>+</AddButton>
    </ScoreWrapper>
  );
};

const AppWrapper = styled.div`
  display: grid;
  grid-template-columns: 1fr 1fr;
  gap: 0.5rem;
`;

export const App: VFC = () => (
  <AppWrapper>
    <Score i={0} />
    <Score i={1} />
  </AppWrapper>
);
Score コンポーネントに 1 人分の情報を載せています。
肝となるのは increment() 関数で、ここでポイント取得時の処理を書いています。コンポーネントの引数 i が 0 だった場合は j が 1 になり、 i が 1 だった場合は j が 0 になります。デュース時はアドバンテージを取っていない側がポイントした場合、アドバンテージを取っている側の点数が下がる (40 ポイントに戻る) ので、操作対象の逆サイドのインデックスを j として持っています。あとは、ポイント得点状況に応じてポイントやゲーム数を操作し、 setScores() で設定します。
あとは styled-components を使用して UI を組み立てるだけです。
ポイントの型は 0 | 1 | 2 | 3 | 4 です。これを人間に分かりやすくするため '0' や '15' などの文字列に変換する pointToString() 関数を src/utils.ts に定義します。
import type { ReplicantMap } from './replicant';

export const pointToString = (
  p: ReplicantMap['scores'][0]['point']
): string => {
  switch (p) {
    case 0:
      return '0';
    case 1:
      return '15';
    case 2:
      return '30';
    case 3:
      return '40';
    case 4:
      return 'Adv.';
    default: {
      const _v: never = p;
      return _v;
    }
  }
};
switch 文を使用して文字列に変換しています。 case の漏れを TypeScript で検出するため、 default で never 型の変数へ代入する処理を行っています。
npm run build でビルドし、 NodeCG を起動してダッシュボードを見てみましょう。以下のようなパネルが出てきます。実際に操作してみましょう。
npm run watch コマンドで webpack を起動したままにすると、ソースコードを編集した際に自動でビルドし直してくれます。スタイルの調整などに活用しましょう。
編集パネルの作成
プレイヤー名や得点表示の編集を行う Dashboard パネルを作ります。ライブ配信前の準備や、ライブ配信中の表示トラブルに備えて、名前や得点を自由に操作できるようにします。
package.json の NodeCG Manifest にパネルの定義を追加します。名前は editor とします。
 {
   "name": "tennis",
   // ...
   "nodecg": {
     "compatibleRange": "^1.1.1",
     "dashboardPanels": [
       {
         "name": "point",
         "title": "Point",
         "width": 3,
         "file": "point.html",
         "headerColor": "#525F78"
       },
+      {
+        "name": "editor",
+        "title": "Editor",
+        "width": 3,
+        "file": "editor.html",
+        "headerColor": "#525F78"
+      }
     ]
   }
 }
続いて webpack.config.ts に設定を追加します。
 const config: Configuration[] = [
   createBrowserConfig('dashboard', 'point'),
+  createBrowserConfig('dashboard', 'editor')
 ];
src/dashboard/editor ディレクトリを作成し、 index.html と index.tsx を作成します。
$ mkdir -p src/dashboard/editor
<!DOCTYPE html>
<html lang="ja">
<head>
  <meta charset="UTF-8">
  <meta name="viewport" content="width=device-width, initial-scale=1.0">
  <title>Editor</title>
</head>
<body>
  <div id="app"></div>
</body>
</html>
import React from 'react';
import ReactDOM from 'react-dom';
import { GlobalStyle } from '../../style';
import { App } from './App';

ReactDOM.render(
  <React.StrictMode>
    <GlobalStyle />
    <App />
  </React.StrictMode>,
  document.getElementById('app')
);
App.tsx を作成します。
import React, { type VFC } from 'react';
import styled from 'styled-components';
import { NameEditor } from './NameEditor';
import { ScoreEditor } from './ScoreEditor';

const AppWrapper = styled.div`
  display: flex;
  flex-direction: column;
  gap: 1rem;
`;

export const App: VFC = () => (
  <AppWrapper>
    <NameEditor />
    <ScoreEditor />
  </AppWrapper>
);
NameEditor と ScoreEditor を返すように書きました。それぞれ名前変更とスコア変更用のコンポーネントです。名前変更コンポーネント NameEditor.tsx を作成します。
import React, { useCallback, useRef, type VFC } from 'react';
import styled from 'styled-components';
import { useReplicant } from '../../hooks';
import { Button } from '../ui';

const Wrapper = styled.div`
  display: flex;
  flex-direction: column;
  gap: 0.5rem;
`;

const InputContainer = styled.div`
  display: flex;
  gap: 0.5rem;
`;

const Input = styled.input`
  flex: 1;
`;

const ApplyButton = styled(Button)`
  display: flex;
  align-items: center;
  justify-content: center;
  padding: 0.5rem;
`;

export const NameEditor: VFC = () => {
  const [names, setNames] = useReplicant('names');
  const name0ref = useRef<HTMLInputElement>(null);
  const name1ref = useRef<HTMLInputElement>(null);

  const onApply = useCallback(() => {
    setNames([name0ref.current?.value ?? '', name1ref.current?.value ?? '']);
  }, [setNames]);

  if (typeof names === 'undefined') return null;

  return (
    <Wrapper>
      <InputContainer>
        <Input ref={name0ref} defaultValue={names[0]} size={1} />
        <Input ref={name1ref} defaultValue={names[1]} size={1} />
      </InputContainer>
      <ApplyButton color="danger" onClick={onApply}>
        名前を変更
      </ApplyButton>
    </Wrapper>
  );
};
HTMLInputElement の ref を取得しておき、適用ボタンが押されたらテキストフィールドの値を読んで Replicant に設定します。特に難しいことはやっていないはずです。
スコア変更コンポーネント ScoreEditor.tsx を作成します。
import React, { useState, type VFC } from 'react';
import styled from 'styled-components';
import { useReplicant } from '../../hooks';
import { replicantDefaultValues, Score } from '../../replicant';
import { Button } from '../ui';

const ScorePartWrapper = styled.div`
  display: flex;
  flex-direction: column;
  flex: 1;
  gap: 0.5rem;
`;

const Input = styled.input`
  width: 100%;
`;

const Select = styled.select`
  padding: 0.5rem;
  font-size: 1rem;
  border: 1px solid gray;
  border-radius: 4px;
`;

const ScorePartEditor: VFC<{
  score: Score;
  counterpartPoint: Score['point'];
  onChange: (score: Score) => void;
}> = ({ score, counterpartPoint, onChange }) => (
  <ScorePartWrapper>
    <Input
      type="number"
      value={score.game}
      min={0}
      onChange={e => onChange({ ...score, game: Number(e.target.value) })}
    />
    <Select
      onChange={e =>
        onChange({ ...score, point: Number(e.target.value) as Score['point'] })
      }
    >
      <option value={0} disabled={counterpartPoint === 4}>
        0
      </option>
      <option value={1} disabled={counterpartPoint === 4}>
        15
      </option>
      <option value={2} disabled={counterpartPoint === 4}>
        30
      </option>
      <option value={3}>40</option>
      <option value={4} disabled={counterpartPoint !== 3}>
        Adv.
      </option>
    </Select>
  </ScorePartWrapper>
);
const Wrapper = styled.div`
  display: flex;
  flex-direction: column;
  gap: 0.5rem;
`;

const InputContainer = styled.div`
  display: flex;
  gap: 0.5rem;
`;

const ApplyButton = styled(Button)`
  display: flex;
  align-items: center;
  justify-content: center;
  padding: 0.5rem;
`;

export const ScoreEditor: VFC = () => {
  const [editingScores, setEditingScores] = useState(
    replicantDefaultValues.scores
  );
  const [, setScores] = useReplicant('scores');
  return (
    <Wrapper>
      <InputContainer>
        {([0, 1] as const).map(i => (
          <ScorePartEditor
            key={i}
            score={editingScores[i]}
            counterpartPoint={editingScores[1 - i].point}
            onChange={v =>
              setEditingScores(
                e => e.map((s, j) => (i === j ? v : s)) as [Score, Score]
              )
            }
          />
        ))}
      </InputContainer>
      <ApplyButton color="danger" onClick={() => setScores(editingScores)}>
        スコアを変更
      </ApplyButton>
    </Wrapper>
  );
};
まずは ScorePartEditor について見ていきます。これは 1 人分のスコアを入力するコンポーネントで、値が変更されたら onChange プロパティを通じて親コンポーネントに通知されます。あとはボタンで値を操作する UI を組み上げています。
あとは ScorePartEditor コンポーネントを使用して ScoreEditor コンポーネントを組み上げます。
作成したパネルは以下のようになります。

名前やスコアを編集するなど、ライブ配信中に操作することが無いようなものは、ボタンを赤色に設定するなどして注意を促しましょう。 Graphics を非表示にする機能をつけて、非表示にしている間しか編集できないようにするのも一つの手です。
前回の値を保持するフックの作成
Graphics を作る前に、値が変更される前の値を保持する usePrevious() フックを作成します。 Graphics で値が変更されるとき、前回の値から現在の値にトランジションするアニメーションを実装するので、前回の値が必要になります。
src/hooks.ts に usePrevious() フックを作成します。
-import { useCallback, useEffect, useState } from 'react';
+import { useCallback, useEffect, useRef, useState } from 'react';
 import { replicantDefaultValues, type ReplicantMap } from './replicant';

 export const useReplicant = <T extends keyof ReplicantMap>(
   name: T
 ): [ReplicantMap[T] | undefined, (newValue: ReplicantMap[T]) => void] => {
   const [rep] = useState(() =>
     nodecg.Replicant(name, {
       defaultValue: replicantDefaultValues[name]
     })
   );
   const [value, setValue] = useState(rep.value);
   useEffect(() => {
     const handleChange = (newValue: ReplicantMap[T]) => setValue(newValue);
     rep.on('change', handleChange);
     return () => {
       rep.removeListener('change', handleChange);
     };
   }, [rep]);
   return [value, useCallback(newValue => (rep.value = newValue), [rep])];
 };

+export const usePrevious = <T>(value: T): T | undefined => {
+  const ref = useRef<T>();
+  useEffect(() => {
+    ref.current = value;
+  }, [value]);
+  return ref.current;
+};
これは React のドキュメント にも書かれています。 usePrevious() は props や state でも、計算された値でも使用することができます。
Graphics の作成
package.json の NodeCG Manifest に Graphics の定義を追加します。名前は main とします。
 {
   "name": "tennis",
   // ...
   "nodecg": {
     "compatibleRange": "^1.1.1",
     "dashboardPanels": [
       {
         "name": "point",
         "title": "Point",
         "width": 2,
         "file": "point.html",
         "headerColor": "#525F78"
       },
       {
         "name": "editor",
         "title": "Editor",
         "width": 2,
         "file": "editor.html",
         "headerColor": "#525F78"
       }
     ],
+    "graphics": [
+      {
+        "file": "main.html",
+        "width": 1920,
+        "height": 1080
+      }
+    ]
   }
 }
続いて webpack.config.ts に設定を追加します。事前に定義した createBrowserConfig() 関数を使用します。
 const config: Configuration[] = [
   createBrowserConfig('dashboard', 'point'),
   createBrowserConfig('dashboard', 'editor'),
+  createBrowserConfig('graphics', 'main')
 ];
src/graphics/main ディレクトリを作成し、その中に index.html と index.tsx を作成します。
$ mkdir -p src/graphics/main
<!DOCTYPE html>
<html lang="ja">
<head>
  <meta charset="UTF-8">
  <meta name="viewport" content="width=device-width, initial-scale=1.0">
  <title>Main</title>
</head>
<body>
  <div id="app"></div>
</body>
</html>
import React from 'react';
import ReactDOM from 'react-dom';
import { GraphicsGlobalStyle } from '../../style';
import { App } from './App';

ReactDOM.render(
  <React.StrictMode>
    <GlobalStyle />
    <App />
  </React.StrictMode>,
  document.getElementById('app')
);
Graphics では <GlobalStyle> の代わりに <GraphicsGlobalStyle> を定義して使います。スタイルのリセットと、配信画面に表示される文字のフォントを定義します。今回は Google Fonts から Montserrat と Noto Sans JP を import しました。
 import { createGlobalStyle } from 'styled-components';

 export const GlobalStyle = createGlobalStyle`
   /* ... */
 `;

+export const GraphicsGlobalStyle = createGlobalStyle`
+  * {
+    margin: 0;
+    padding: 0;
+    box-sizing: border-box;
+    overflow: hidden;
+  }
+
+  @import url('https://fonts.googleapis.com/css2?family=Montserrat&family=Noto+Sans+JP&display=swap');
+`;
App.tsx を作成します。
import React, { type VFC } from 'react';
import styled from 'styled-components';
import { useReplicant } from '../../hooks';
import { pointToString } from '../../utils';
import { AnimatedPoint } from './Point';

const Wrapper = styled.div`
  display: flex;
  flex-direction: column;
  justify-content: flex-end;
  width: 1920px;
  height: 1080px;
  font-family: Montserrat, 'Noto Sans JP', sans-serif;
`;

const Board = styled.div`
  display: flex;
  flex-direction: column;
  justify-content: space-around;
  width: 1920px;
  height: 400px;
  background: linear-gradient(#00000000, #00000080);
`;

const PointWrapper = styled.div`
  display: flex;
  justify-content: space-around;
  filter: drop-shadow(0 0 8px black);
`;

const NameAndGame = styled.div`
  position: relative;
  width: 1920px;
  height: 100px;
  filter: drop-shadow(0 0 8px black);
`;

const NameWrapper = styled.div`
  position: absolute;
  width: 1920px;
  height: 100px;
  top: 0;
  left: 0;
  display: flex;
  justify-content: space-around;
`;

const Name = styled.p`
  font-size: 60px;
  width: 50%;
  color: white;
  text-align: center;
  align-items: center;
`;

const GameWrapper = styled.div`
  position: absolute;
  width: 1920px;
  height: 100px;
  top: 0;
  left: 0;
  display: flex;
  justify-content: center;
`;

const Game = styled.p`
  width: 80px;
  font-size: 80px;
  color: white;
  text-align: center;
  align-items: center;
`;

export const App: VFC = () => {
  const [names] = useReplicant('names');
  const [scores] = useReplicant('scores');

  if (typeof names === 'undefined' || typeof scores === 'undefined')
    return null;

  return (
    <Wrapper>
      <Board>
        <PointWrapper>
          <AnimatedPoint>{pointToString(scores[0].point)}</AnimatedPoint>
          <AnimatedPoint>{pointToString(scores[1].point)}</AnimatedPoint>
        </PointWrapper>
        <NameAndGame>
          <NameWrapper>
            <Name>{names[0]}</Name>
            <Name>{names[1]}</Name>
          </NameWrapper>
          <GameWrapper>
            <Game>{scores[0].game}</Game>
            <Game>-</Game>
            <Game>{scores[1].game}</Game>
          </GameWrapper>
        </NameAndGame>
      </Board>
    </Wrapper>
  );
};
なにやらジャラジャラしていますが、スタイルをつけてコンポーネントを組んでいるだけです。画面のサイズは 1920x1080 と決まっているため、レスポンシブ対応などをする必要はもちろんありません。
<AnimatedPoint> コンポーネントはアニメーションなど複雑なことをするため、別ファイルに分けています。 src/graphics/main/Point.tsx にコンポーネントを書きます。
import React, { type VFC } from 'react';
import styled, { keyframes } from 'styled-components';
import { usePrevious } from '../../hooks';

const PointContainer = styled.div`
  position: relative;
  width: 50%;
  height: 240px;
`;

const Point = styled.p`
  position: absolute;
  width: 100%;
  height: 240px;
  font-size: 240px;
  color: white;
  text-align: center;
  animation-duration: 0.5s;
`;

const flipOut = keyframes`
  0% {
    transform: rotateX(0deg);
    opacity: 1;
  }
  50% {
    opacity: 0;
  }
  100% {
    transform: rotateX(-180deg);
    opacity: 0;
  }
`;

const PreviousPoint = styled(Point)`
  animation-name: ${flipOut};
  transform: rotateX(-180deg);
  opacity: 0;
`;

const flipIn = keyframes`
  0% {
    transform: rotateX(180deg);
    opacity: 0;
  }
  50% {
    opacity: 0;
  }
  100% {
    transform: rotateX(0deg);
    opacity: 1;
  }
`;

const CurrentPoint = styled(Point)`
  animation-name: ${flipIn};
`;

export const AnimatedPoint: VFC<{ children: string }> = React.memo(
  function AnimatedPoint({ children }) {
    const previous = usePrevious(children) ?? '';
    return (
      <PointContainer>
        <PreviousPoint key={previous}>{previous}</PreviousPoint>
        <CurrentPoint key={children}>{children}</CurrentPoint>
      </PointContainer>
    );
  }
);
親コンポーネントからポイントを表す文字列を children として渡してもらいます。事前に定義した usePrevious() フックを使用して、 children の変化前の値を previous に保存します。 <PointContainer> に position: relative; を設定し、 <PreviousPoint> と <CurrentPoint> に position: absolute; を設定することで表示を重ね、それぞれをキーフレームアニメーションさせます。アニメーションは transform で回転させながら opacity でクロスフェードさせるシンプルなアニメーションです。
コンポーネントに key プロパティを使うことで、キーフレームアニメーションを再度トリガーすることができます。 key プロパティは通常、リストをレンダリングする際に指定する必要があるものですが、リストでない場所で使用し値を変化させることで要素を再マウントさせることができます。
OBS でレイアウト
Bundle をビルドし、 NodeCG を起動して OBS でレイアウトしましょう。以下のようになるはずです。
OBS 上で手打ちすると面倒なものを NodeCG で簡単に実現することができました。またスコアが変更される時、アニメーションで表示が切り替わります。これは OBS 単体ではできないことです。
おわり
React と webpack で Bundle を作成し、 OBS 上でレイアウトするまでを紹介しました。今回はテニスのスコア表示という題材を選びましたが、麻雀の点数表示などもっと複雑なものだと自動化の恩恵をより受けることができると思います。
本記事で Graphics は HTML5 と CSS を駆使して実装しましたが、当然 <canvas> 要素も使えますので、どのような Graphics でも作ることができます。しっかりアルファチャンネルもあるので、半透明もちゃんと扱えます。さまざまなエフェクトを Graphics で作るのも面白そうです。
また、今回はユーザーが Dashboard を操作することで Graphics の更新を行なっていましたが、 Extensions と外部の API などを使用することで、状況に応じてリアルタイムに変化する Graphics を作ることもできます。 RTA イベントでのタイマー表示やツイート表示など、よりライブ配信を豊かにすることができます。